This post contains affiliate links. For more information see our disclosure policy.
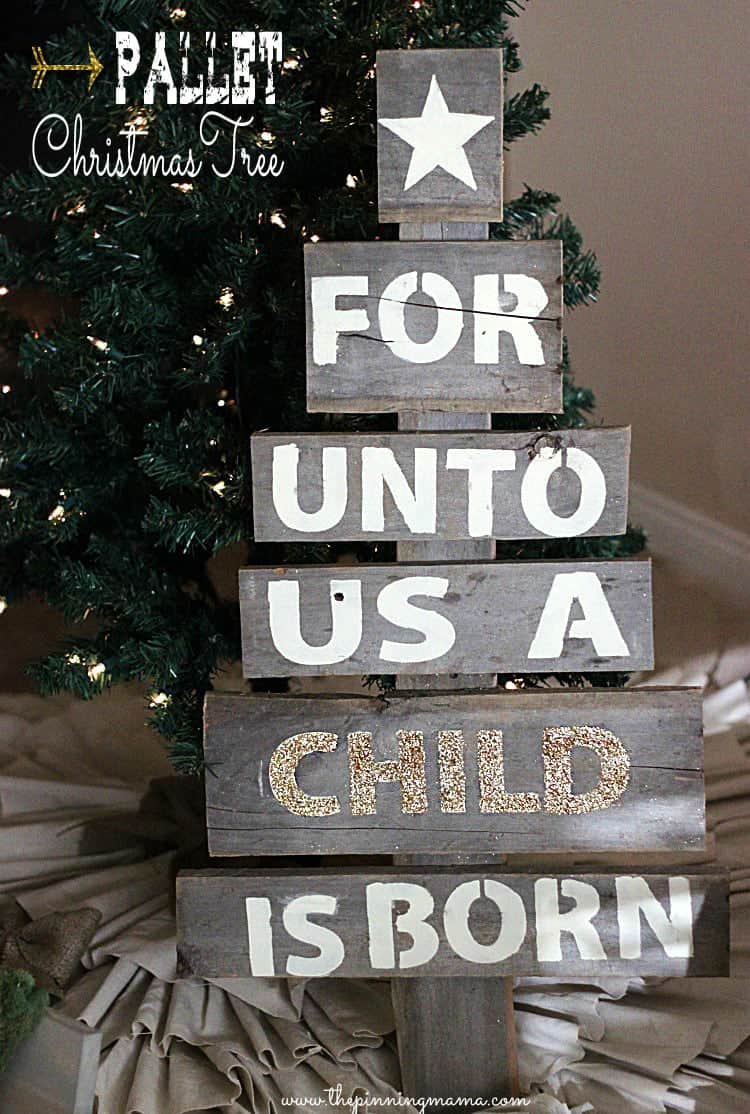
Christmas is just around the corner and I am still yet to share some of my favorite crafts of the season with you! This easy upcycled Christmas tree made from an old pallet has to be one of my all time favs! It has all the components of my perfect craft, a little bit rustic, a little bit new, a little bit of glitter, and a few words too! Sorry, I can’t help rhyming. I have been reading How The Grinch Stole Christmas every other minute for the past two weeks straight.
I knew this pallet tree would be on my to do list this Christmas as I have had it pinned for quite a while! However, when I went looking for a tutorial all I could find were some beautiful Etsy listings. So if you don’t want to make it and would rather just buy, I suggest here or here. Otherwise, read on!
What you will need for this project:
1 Old wooden pallet
White craft paint
Paint brush
Stencil (I used my Silhouette Cameo to cut the stencil)
Deco Art Glamour Dust Glitter in Gold
Wood Glue
First you will need to scounge up an old pallet. I got mine at our local nursery. I really prefer it when I can get the pallets there because they are always really old and grubby. Some of the ones you find at retail stores are too new looking and that just adds a whole extra step of distressing!
First disassemble your pallet carefully. I am sure there are rusty nails and all sorts of danger lurking in doing this so be smart people.
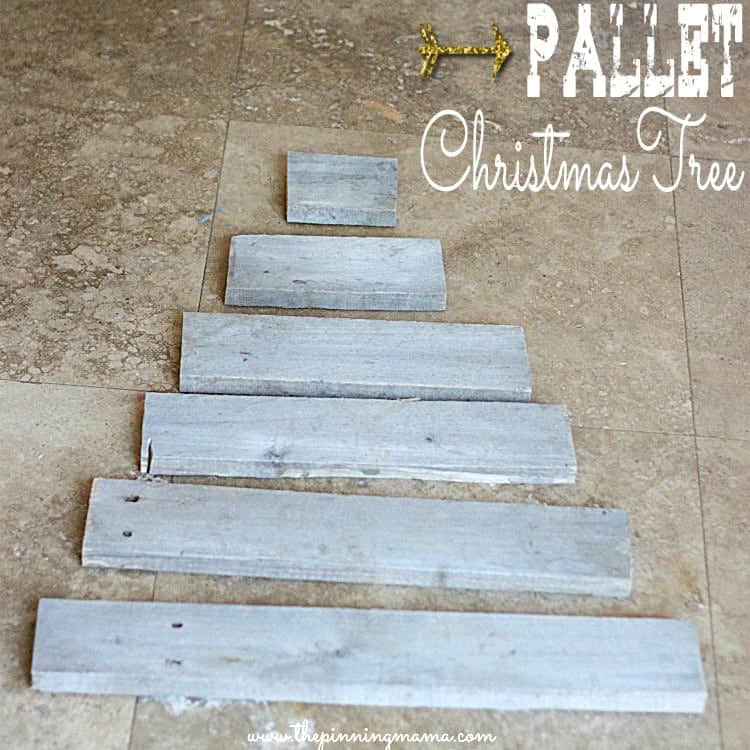
Now cut down your wood into pieces so it will build the tree. The lengths I used for the tree were:
- 21″
- 18″
- 15″
- 12.5″
- 8″
- 4.5″
- 34″ for the stem behind the tree.
Now if you used a nice grubby pallet like me, give your wood a good scrub down to get rid of any excess dirt and debris and let dry.
Next I used my Silhouette to cut stencils for the wording on the tree onto two pieces of 12″x12″ cardstock. If you don’t have a Silhouette, you could also use stencils found at the craft store, but the size might not be quite as perfect!
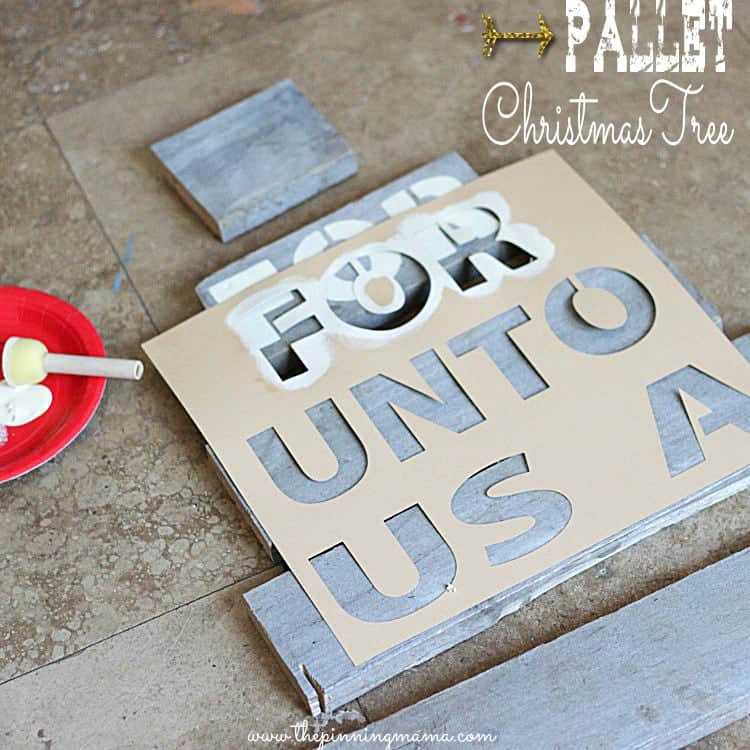
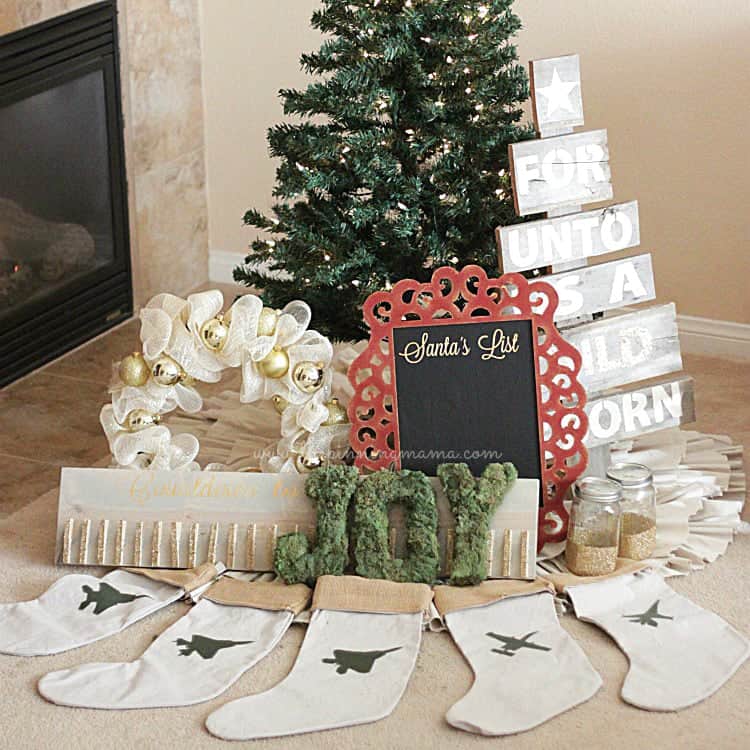
Then you just use your craft paint to fill in the letters with the stencil. It is always best to dab your brush on stencils, not use brush strokes. You can see how I spaced the words “For unto us a child is born” two different ways above and below. If you are accenting with the glitter like I did above, I would definitely leave “child” on it’s own line.
Once your paint dries, use a clean brush to generously apply the Americana Decou-Page over the white paint on the letters of CHILD. Then sprinkle generously with gold glitter and let dry.
Once the glitter and glue has dried, shake the excess glitter off. At this point you can also seal the glitter by applying another coat of decoupage, or just leave it as is and you might have a little bit of glitter shed.
Now use a generous amount of wood glue to secure your tree branches to the long trunk of the tree. I put several heavy books on top while it was drying to make sure it adhered well.
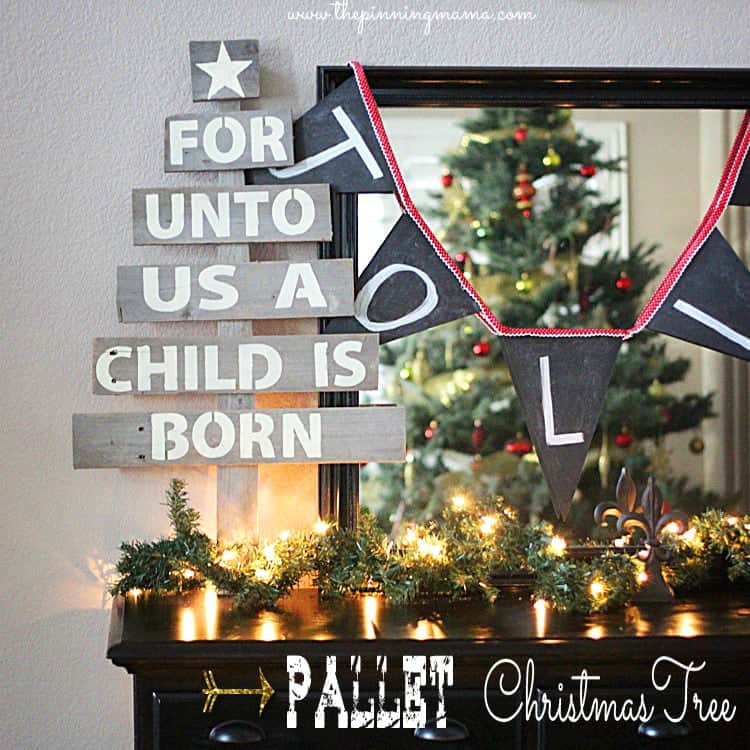
That is all there is to this beautiful and rustic Pallet Christmas Tree. It makes a lovely addition to any Christmas decor, or is great for a gift basket like I used it for here!
Thanks for stopping by today, I really hope you and your family have a truly special Christmas this year. If you would like to keep up with The Pinning Mama projects and freebies, I would love for you to follow us on Facebook or Pinterest.


Lisa says
Cute! And I love everything in the gift basket!
Kimber says
THank you so much Lisa! It is so good to see your name pop up! Too bad you weren’t there to bid on the basket!
Michelle says
What a great idea! My husband has pallets he is looking to get rid of at work all the time!
Kimber says
Thanks Michelle! What a pallet gold mine! You could craft up a storm with a ready supply haha!
Dawn says
Love this project, thanks for sharing! did you make a special base for it?
Kimber says
Thanks Dawn! I did not make a base. Mine leans up against the wall a bit, you could also hang it.