Beautiful little tutus! I have to admit that those frilly pink tutus are one of the things that make having a girl so absolutely fun. My baby girl is now 14 months (technically not even a baby anymore) and I still get a kick out of dressing her up. Few things in life are as genuinely cute as little girl clothes! Even my friends that aren’t “girly” love dressing up their daughters. Little boys get dressed up like little men, but little girls have a so many fun options that are just especially for little girls!
![]()
When I found out I was having a girl, I knew that I would need to know how to make a tutu. It seemed like a necessary skill for a crafty mom of any little girl. Tutu’s are so versatile. They can dress up an outfit, make a perfect prob for a picture, or add a bit of flair to a halloween costume. And seeing as how it can be worn to church or Halloween, it might just be the most flexible piece a little girl owns, haha!
There are millions of ways and versions on how to make a tutu out there. I went through plenty, combined a few techniques and came up with what I think is the quickest and easiest way to make a tutu for your little princess. Because anybody who reads this blog knows that with two tiny kids, I LOVE my crafts to be quick and easy!
After I finished the tutorial I felt the need to come back up and add this note. I promised a quick and easy project, yet my instructions seem really lengthy. It is not because it is hard, just beacuse I tried to be through in all of the details of how to make the tutu so there would be no question on the method I used. So no fear! Quick and easy… I promise!
Here is the method:
Gather your tools:
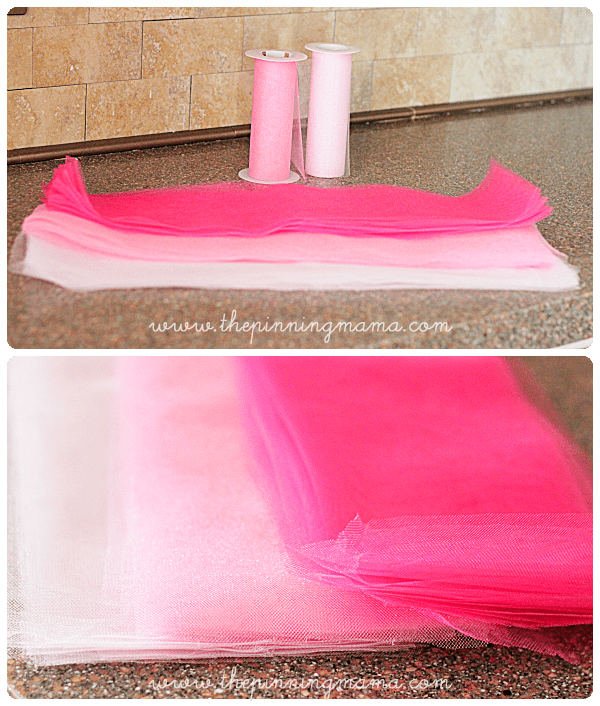
- 6″ rolls of tulle (each roll is usually 25 yards)- You can use as many colors as you like, I prefer 1-3 colors in each tutu
- 1/2- 1 inch sturdy elastic- I used 15 inches to make a tutu sided for a 1 year old.
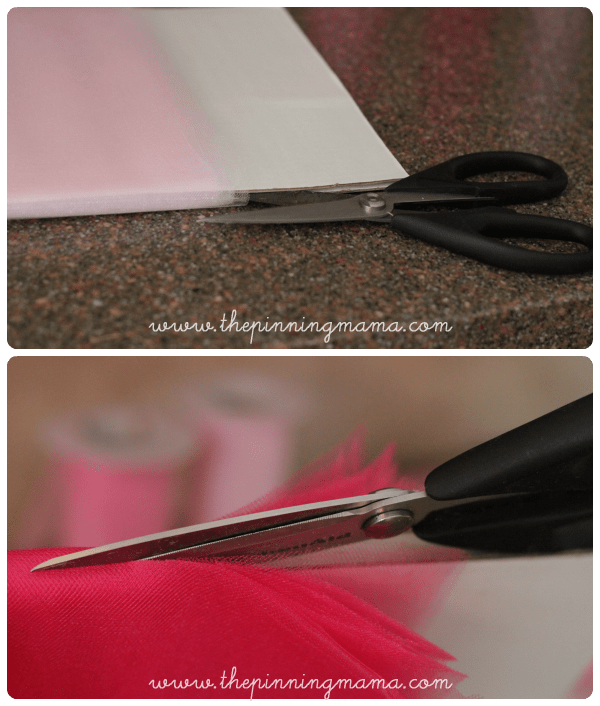
- Scissors
- 2 Pieces of Cardboard
****Update: I get a lot of questions on where to buy the tulle. You can get rolls at most major craft stores or on Amazon as a single roll of tulle or very inexpensively as a bundle. *****
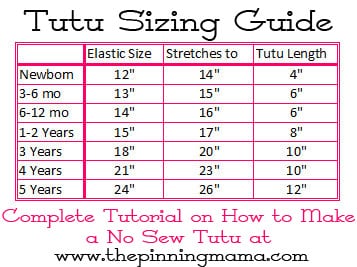
First you will need to decide your sizing for your tutu. The best thing to do is to measure your little one to get a waist measurement and approximate of how long you want your tutu to be. I also use this size guide as a reference tool.
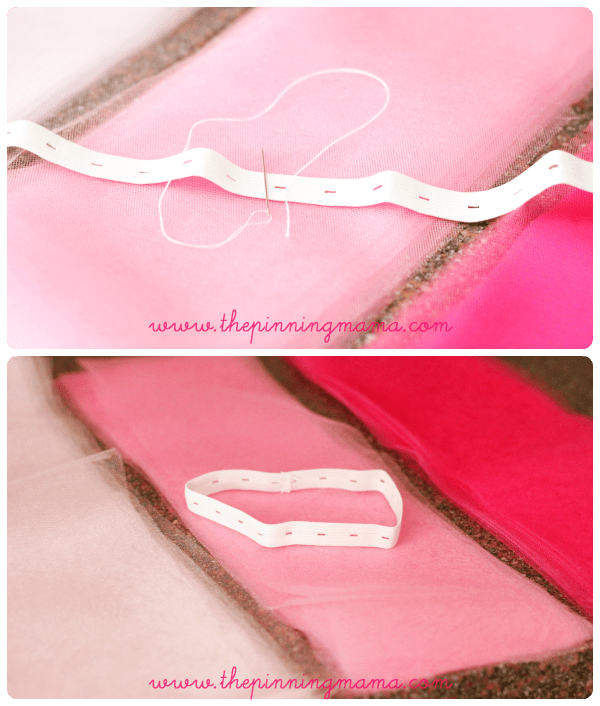
Cut your elastic about an inch longer than your desired waist size. You can either tie the ends together (If you want a true no-sew) or quickly use a needle and thread to sew them together (my preferred method.)
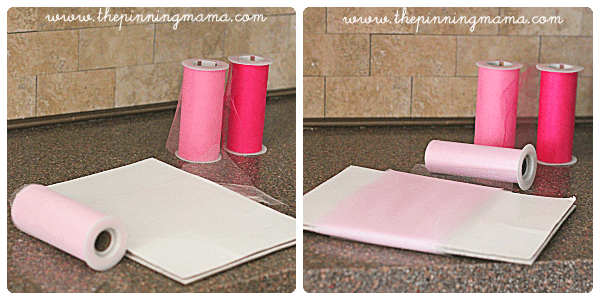
Next you will need your cardboard. You can use anything from a cereal box to the side cut out of a cardboard shipping box. You will want to to cut two identical rectangles out of the cardboard. The width needs to be 8-12 inches (the width does not need to be exact, just wider than your tulle) and the length will be 1/2 in longer than your desired tutu length. So, the cardboard I used was 12″x8.5″.
Now we will cut the tulle. You will need approx 48 strips of tulle for a 15″ tutu. The cardboard will make it easy for us to cut. Take your tulle (if you have multiple colors, use the first color) and place the end of the tulle at the end of your cardboard (both pieces will be placed together) then wrap it around the cardboard (the side that is the length you want your tutu +1/2″) continue to wrap around your board until the number of times it is fully wrapped around the board equals the number of strips you need. So if I do one color I will make 48 full wraps around the board. If I do two colors I will do 24 full wraps around the board, three colors, 16 full wraps, etc.
Now you will cut down the side of the cardboard you started the wrapping on by sliding the scissors between the two pieces of cardboard which will allow you to cut straight across the the wrapped layers of tulle with no jagged edges. Now you should have a pile of pieces of tulle that are double + 1″ longer than your desired tutu length.
Repeat with any additional colors.
Once you have all of your tulle cut gently stretch your elastic waistband over the cardboard so that it stays in place but is not super stretched out.
Now we will begin wrapping the tulle around the elastic. I always wrap three layers at a time around my elastic, because this allows me to get a really full tutu. You can use more or less to get your desired fullness.
Take 3 layers of tulle, if using multiple colors use one of each, and lay them on top of each other and fold them all in half. Take the folded middle part and side it under the elastic about an inch. Now take the tails of the tulle and pull them over the elastic and through the loop and gently tighten to form a knot.
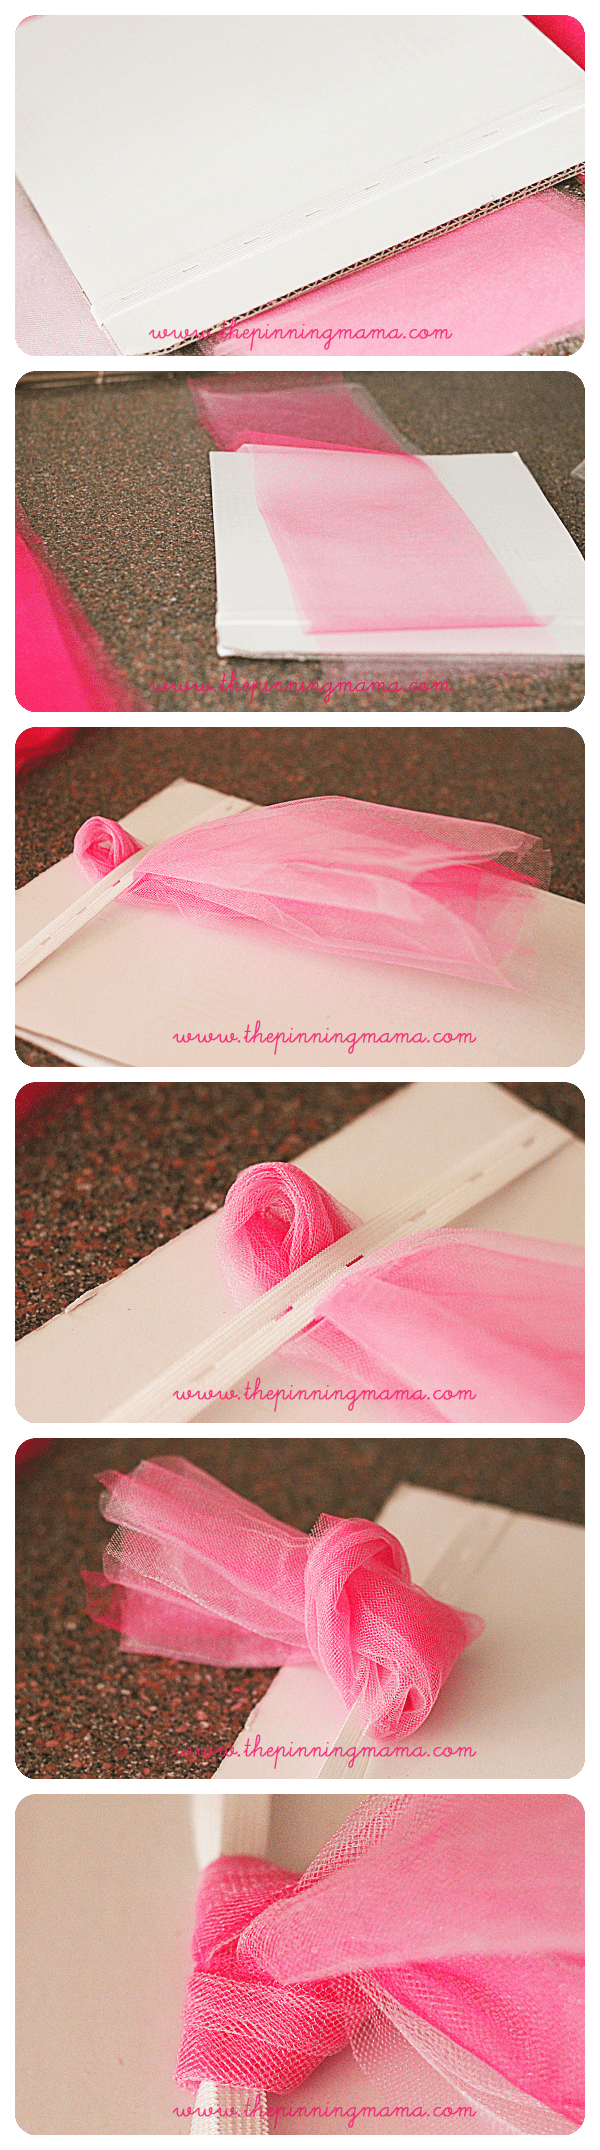
You don’t want to tighten your knot too tight or it will result in stretching out your elastic. Just tighten it enough to be snug but not crushing the elastic. Repeat this step until all of the elastic is filled with knotted tulle. When using multiple colors I like to change the order they are layered in with each group of tulle so that the colors are spread evenly throughout.
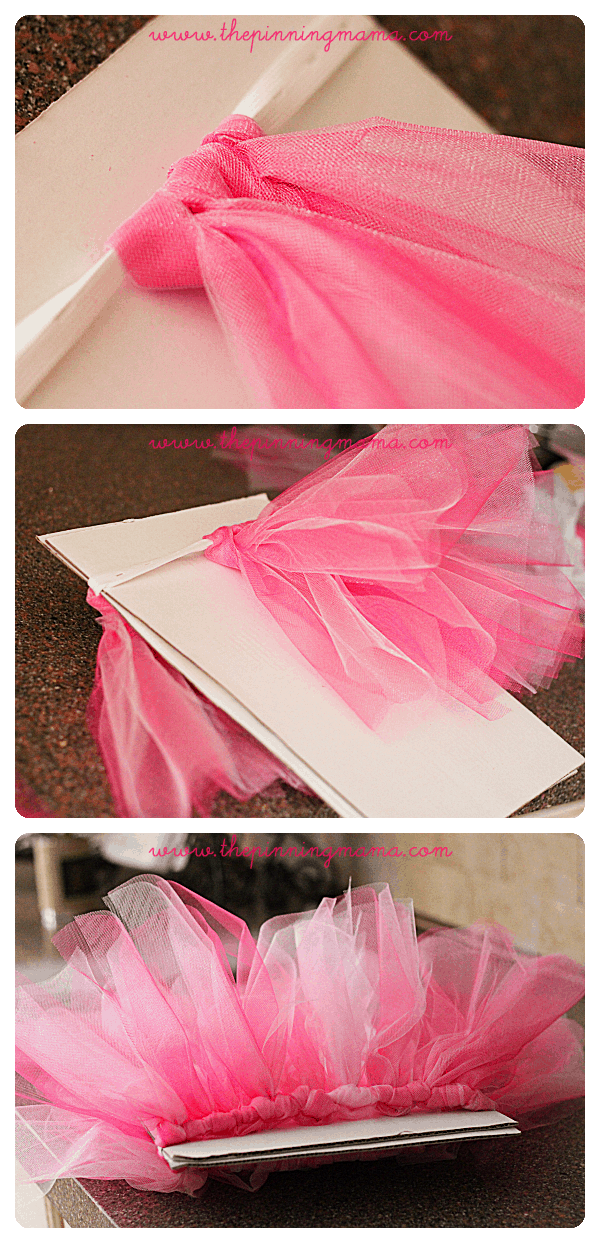
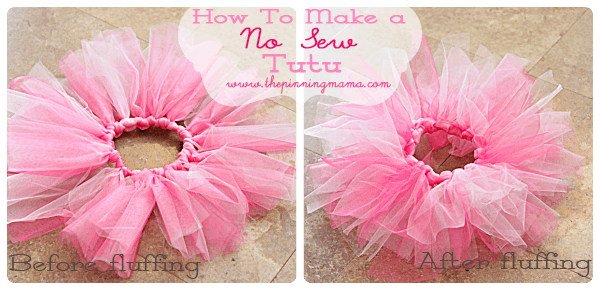
Now all that is left is to fluff your tutu!
Simply go through each layer and pull the tulle to separate it and the result will be a big, fluffy tutu worth of a princess!
If you don’t have time to make it, don’t feel bad! We can’t do it all, but you can grab one that is just as cute and your daughter is sure to love it!
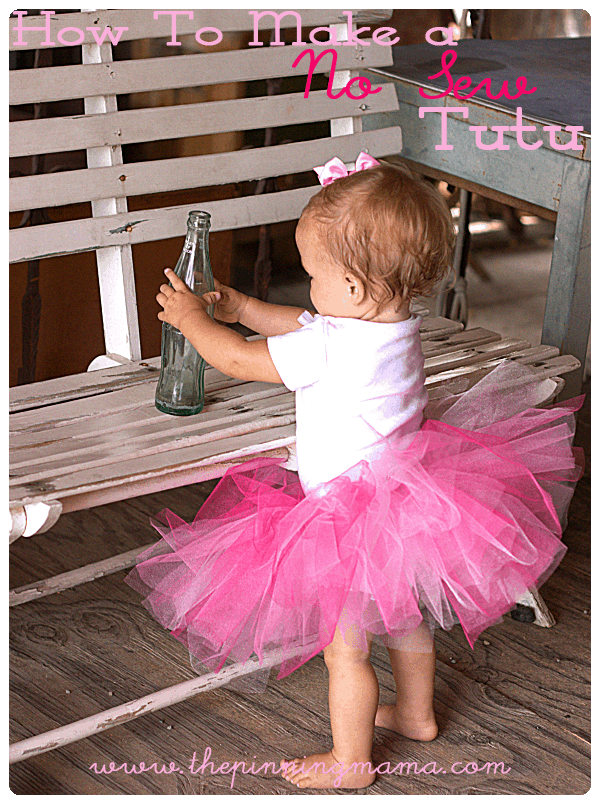
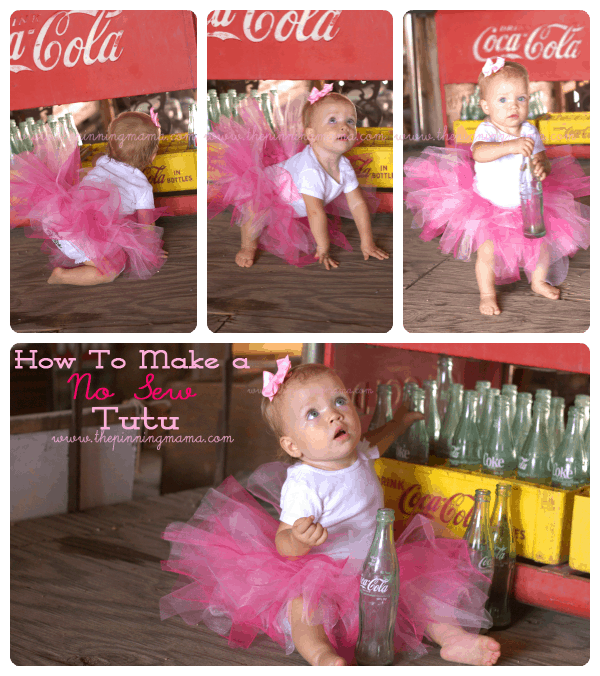
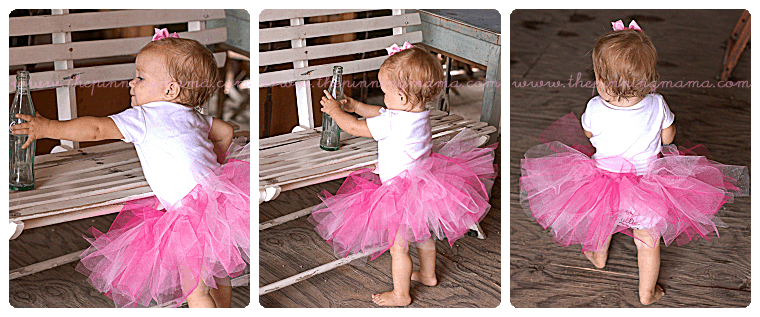
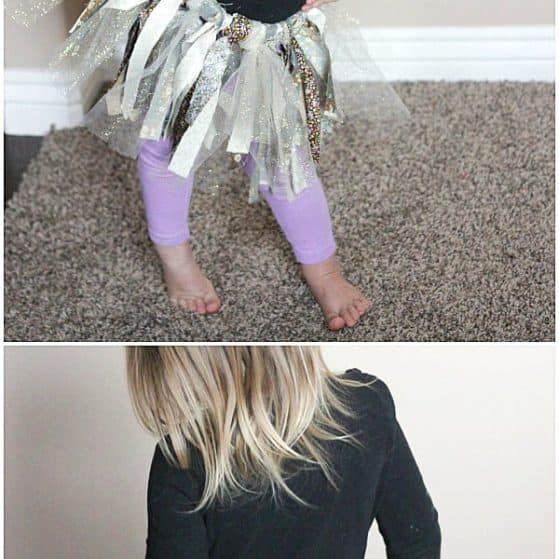
Here are some pics of my daughter with the tutu I just made her. I don’t’ think it gets much cuter than this! I call this the bubble gum tutu. It used three shades of pink and was cut at a 15 in waist and 8 in length.
If you don’t follow us on Facebook we would love you to join us there! We even have special freebies only for our subscribers! Click here to follow us!
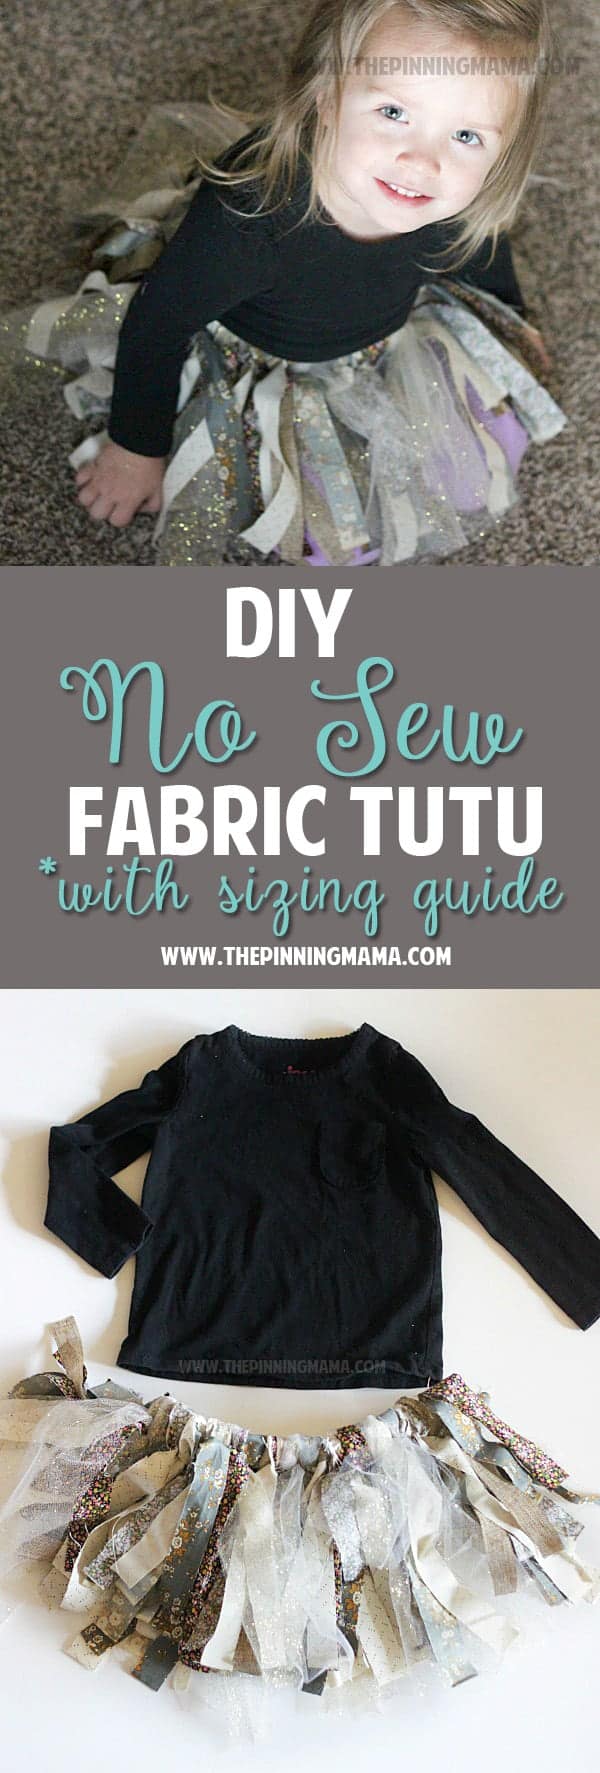
For another fun look, try a fabric tutu! You can learn how to make a Fabric Tutu for little girls here!

Bryn says
Obviously night before trick or treating and I’m making a costume for baby’s first. LOVE your instructions!!! Soooooooooo easy. Took 30 min and I had yards of material I had to cut down to 6 inch strips but still 30 min. Thanks!!!!
Kimber says
So glad it was helpful! What kind of costume did you make?
Rhonda says
Thank you for this great tutorial. I just made one for my 3 yr old neighbor girl for Christmas. She wants to be a ballerina when she grows up. This will be the perfect gift for her!! I can’t wait to give it to her. 🙂
Janice says
Nice job with the tutorial. It is one of the best I have seen.
keysha says
nice job on that tutu.
carol says
Excited to make this! Question…how many more tulle strips (approximately) do you need for the larger waist sizes? If I’m making the 21″ or 24″ tutu I’m wondering about how many strips I’ll need. Thanks!
Amanda says
I loved this blog, very helpful I just made one for my nieces first birthday, can’t wait for her to wear it. Thanks for the awesome directions.
Kimber says
You are so welcome ! Thanks for the sweet comment!
Jacquelyn says
I absolutely LOVE this tutorial! It seems simple enough and I am going to be making a Minnie Mouse version for my daughters first birthday/Disneyland! Your daughter is adorable btw I hope I can make a tutu for mine just like that