A simple tutorial on how to layer heat transfer vinyl with your Silhouette CAMEO or Cricut machine. Just a few simple steps let you layer vinyl into multicolored creations.
******* BREAKING NEWS: I have been so overwhelmed at the response to this post and all the people who have told me that they LOVE this project that I decided to start an Instagram account (like today) dedicated to bringing you craft and DIY project inspiration right in your Instagram fedd! Find me on IG as @CraftInspired *******
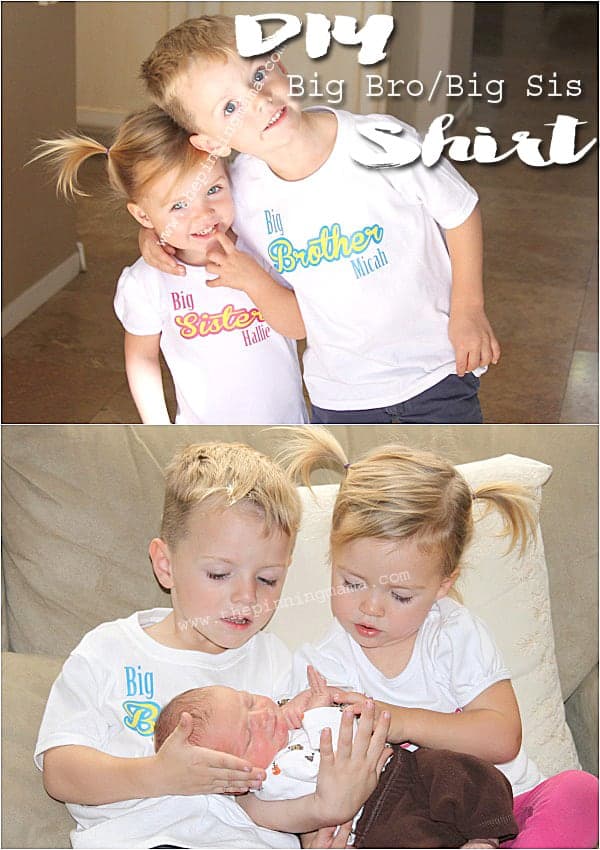
One of my favorite projects I have done with my Silhouette CAMEO are these Big Brother Big Sister shirts. Maybe it is sentimental, or maybe it is just because they are so darn cute, but either way, they were another quick and easy craft thanks to my Silhouette.
I remember when I had my daughter going into a panic two days before labor because I hadn’t thought about what my son would wear when he came to meet his new little sister. This may seem really silly to you as a rational person sitting there reading this, but to a 40 week pregnant woman, this was a near crisis! My very sweet friend Anna dropped everything she was doing and rescued me and helped me hand make a Big Brother shirt. So when baby three was nearing his entrance I knew there was no procrastinating on the outfits for the Big Bro and Big Sis!
Luckily between the time my second was born and the time my third was born I became not only a Silhouette user, but also their biggest fan. I knew I could whip up shirts for them in no time.
To make make these Big Brother Big Sister Shirts you will need these materials:
- T-shirt
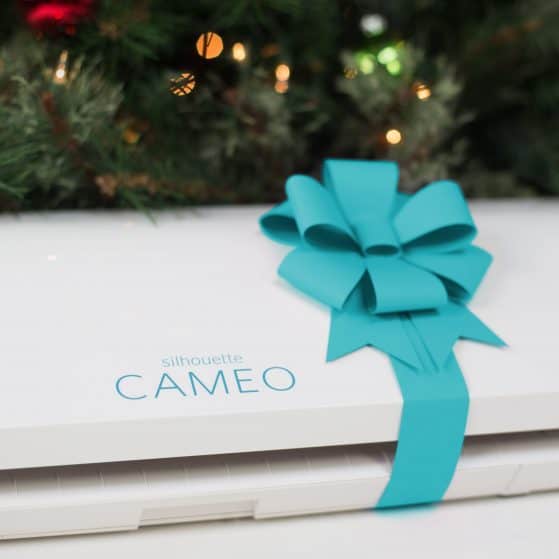
- Silhouette CAMEO or Silhouette Portrait
- Heat Transfer Vinyl in Multiple Colors- Heat Transfer on Amazon or Heat Transfer at Silhouette Store {If you are new to Heat Transfer you might want the Heat Transfer Starter Kit}
- Iron
- Hard Surface
- Parchment Paper or Towel for Ironing
Of course I had “a vision” for these shirts. And of course this vision included something I didn’t know how to do, much less if it could even be done. I wanted a multi colored vinyl design featuring the brother and sister.
So I started brainstorming and then researching and found that layering heat transfer material was quick and easy and results in an awesome final result!
To start, if you are new to Heat Transfer Vinyl check out all my Heat Transfer Tips and Tricks here.
I wanted to layer an outline of text. I found out you can create this effect using the offset feature of the Silhouette Design Software to see how to use the offset feature to create outlined text click here.
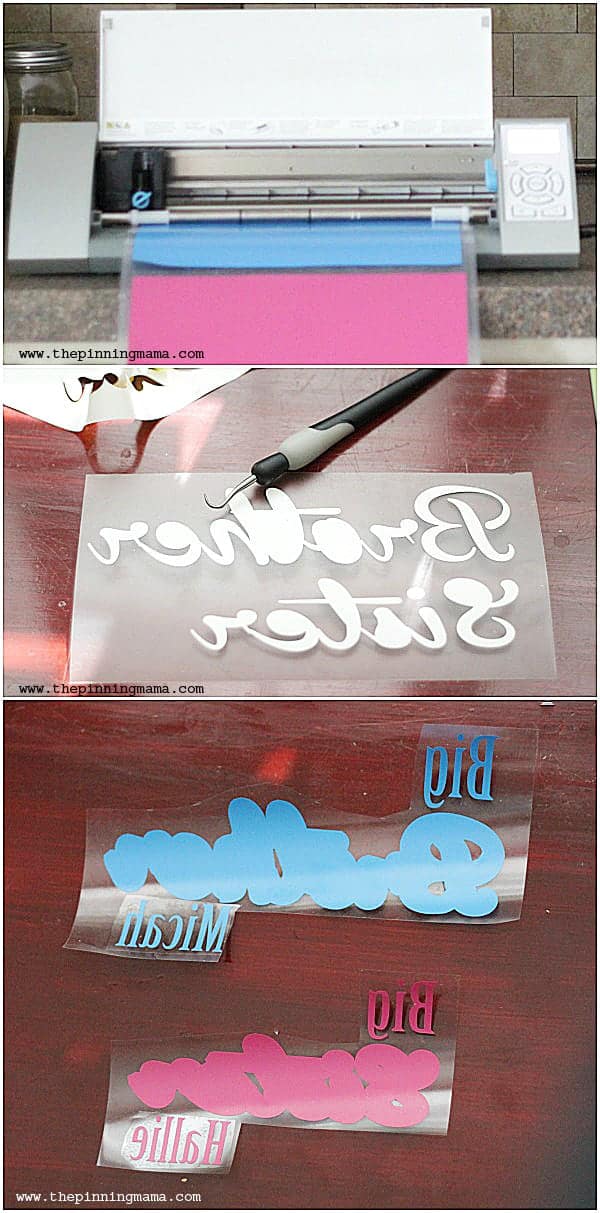
Once I had the shirt designed in the Silhouette Designer Edition Software, I cut each piece out using heat transfer vinyl in the color I wanted. {I have a Beginners Guide to Heat Transfer here if you are unfamiliar!} Once it was cut I used my hook tool to weed the vinyl.
Now it is time to start placing the design on the shirt. Line up you base color on to the shirt. Iron the design onto the shirt and peel back the plastic.
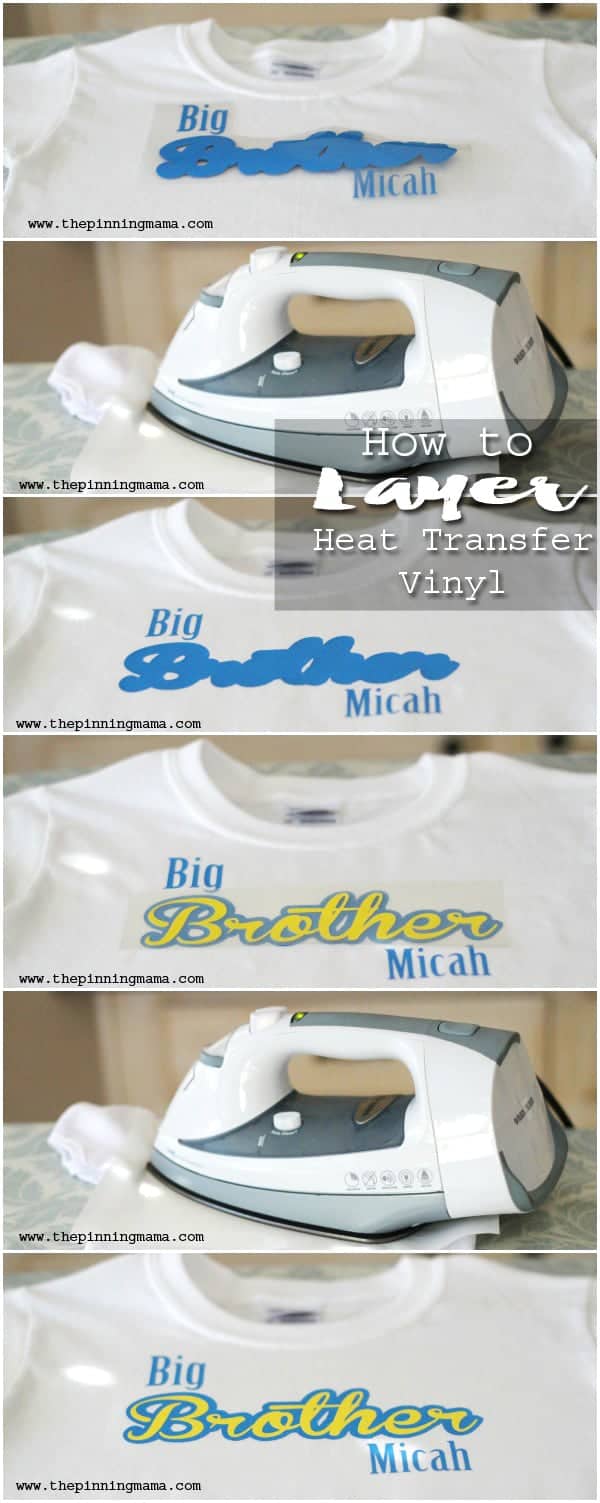
Next line up the inset color on the piece you just ironed on and then iron that piece right on top of the outer piece just as you did the first. Peel off the clear backing.
Really that is all there is to layering HTV! Iron on your base piece, peel backing off, line up your next piece, peel backing off, repeat for any remaining colors.
Seems almost too good to be true for such a professional result, but I assure you it is just that easy!


Michelle says
Do you have any trouble with the lower layers melting? Do you let it cool before adding the next layer?
Kimber says
I did let it cool and have never had any problems with the lower layers. I don’t think it melts as much as can burn it if the iron is too hot.
Mary says
I just did my first layering job and thanks to you it turned out great! But my issue was with carrier sheet leaving a mark (my hubby wont notice it I’m sure) from its stickiness on the lower layer. Any tips for preventing that from happening. I can explain more if you are confused….
Toni says
What is the most amount of colors you have ironed on top of each other? Was there any problems doing so or any suggestions? I’m really not wanting to do a knock out in my design, and am hoping I can layer more then 2.. it’s in smaller areas, but will still be 4 different colors.
El inspiration says
I have a heat press and when I do my transfers it always leave a edge on it after I pull it back. The outline of the of the transfer paper is still seen. Is there a way to get rid of this besides cutting out the whole design on the transfer paper? Or is it just the paper I am using. I have tried many types of transfer paper and maybe I should use just vinyl paper only? The problem with that is my cutter is larger than my paper and doesn’t cut it well. Please help.
Kimber says
I don’t use a heat press but I have heard that you see this because the press evaporates all of the water out of the shirt where it presses and that it should go back to normal after washing if not before.
Nikki says
How well do they hold up in the wash? Are they any more fragile than a professional shirt?
Mary says
Hi….I am new to iron-on but have seen a YouTube video by Lorrie Nunemaker about using a heat press vs. the Easy Press and she washed the items (like 25 plus times) and they looked great. That said I noticed that most of the iron on producers suggest washing material before and then washing inside out. I used Siser Foil and realized after I took it out of the dryer that I was supposed to let it air dry. Oops! I had placed in a garment bag so it was fine but next time….. Read labels on the product you are using or look it up online most websites (like Siser) have detailed directions.
Mercy Dominguez says
Do you have a sight where I can go to learn how to do the outline layer lettering with Cricut Explorer?..
Debra says
My question is, how do you know you are lining up the second or third layer? Are there guides punched into the vinyl?
Kimber says
I just eyeballed it. Since the backing on the heat transfer material is clear, it makes it fairly easy to reposition until you get it perfect.
patricia says
I have a question – what prevents the design from shifting as you layer the parts for instance if you have a single element to layer on you place it in exactly the correct place and as you place your iron or heat press down what keeps it from shifting.? i have never done this before but am try to get the courage to and of course i don’t want to do just a single one color image 😉
Kimber says
That is a great question Patricia! The clear part of the paper is tacky so you can line it up just as you want it then press it with your hands to get it to lightly stick to the object your are transferring onto then place the iron on. I have never had a problem with it moving.
Clk says
Hi. Thanks for tip! I’m new to this. Do you always use an iron or do you also use a heat press? Thanks for any advice.
Kimber says
I personally don’t have a heat press. We move often and they are big, heavy and bulky so it isn’t something that I really want to keep around right now. It is definitely doable with an iron, but if you have the space, and budget, a heat press is awesome to have!
Maura says
Can different types of HTV be layered over each other? Like regular over smooth or the other way around?
Molly says
How well did these hold up in the wash?
Kimber says
For me it has been a little varied. Mostly really well. I have a stretchy shirt that I did 2 years ago that started to peel, but several other shirts I did for my kids they have been wearing for years with no peeling. I did some canvas bags that didn’t take too well, but the fabric may have been treated. Otherwise, I have been pretty impressed with the results!!