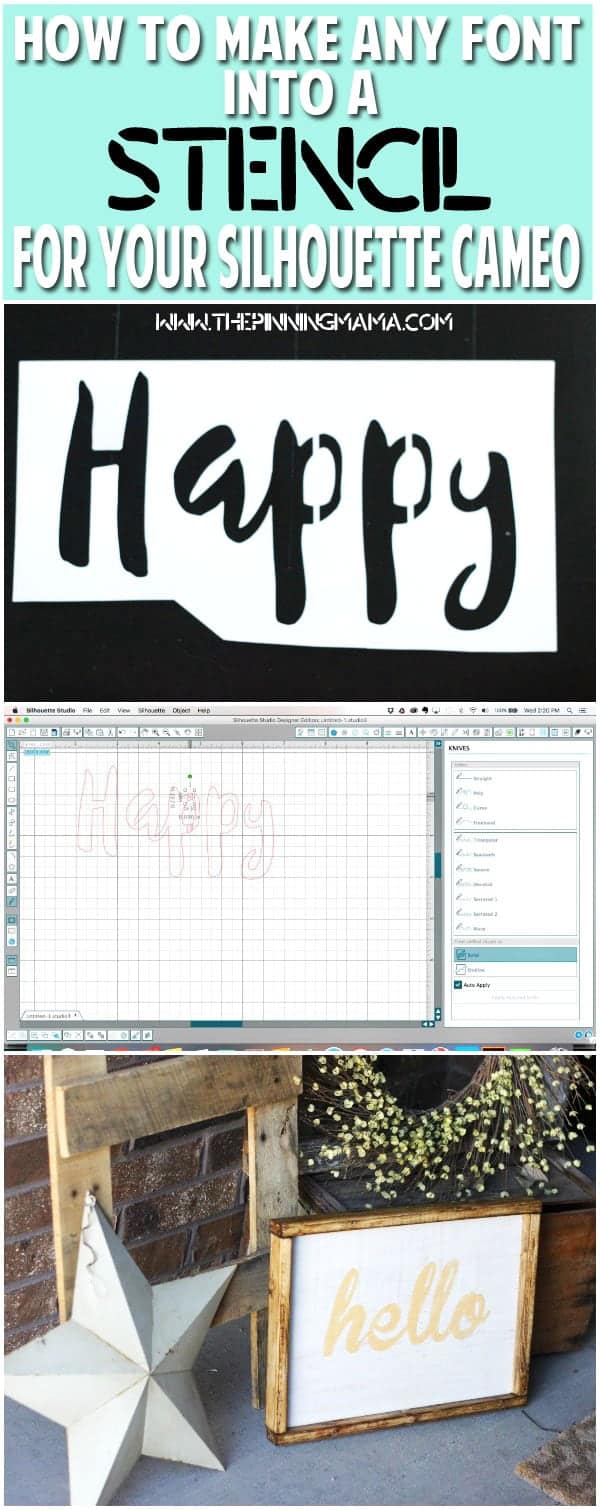
A simple way to make any font into a stencil for use with your Silhouette CAMEO. There are just a few easy steps in the Silhouette Studio Software to turn the words you want to cut into a stencil for your craft project.
Most of the tutorials I do are based on things that I had a hard time figuring out how to do when I was new to my Silhouette CAMEO. So if you are a seasoned user this tutorial might seem a little silly to you, but if you are like me and beating your head agianst a wall trying to figure out something that should be so simple, then hopefully you will love this! I am including both a written and video tutorial to help you best understand what I am doing. I would love to hear in the comments if the video is extra helpful for you. Since I am new to it, it will help me know if I should do more.
I like to use stencils for many things when I am crafting. I have used them from everything to stenciling my daughters monogram on a stool to customizing binders for school. I love to do paint projects and stencils are exactly what you need for those!
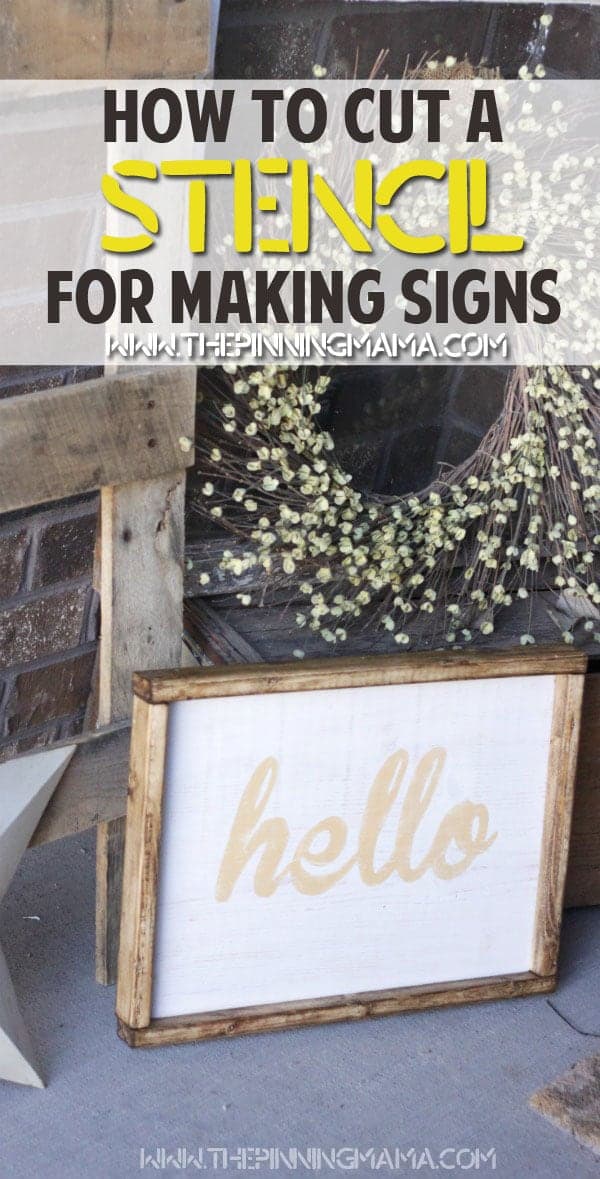
One of the very first projects I did with my machine (and a big reason I wanted one!) was to make a wooden sign. I don’t love to use vinyl on wood signs because I always get super frustrated trying to get it to stick, so my preferred method is cutting a cardstock stencil and using that to paint on the wording or design. {If you don’t have a Silhouette CAMEO , check out the most recent deals here!}
The problem is that I want to use a particular font and it doesn’t cut as a stencil. When I cut a font normally I will lose the middles of the e’s, a’s, o’s etc, and the loopy parts of y’s j’s and more. I figured there had to be a way to get any given font to cut more like a stencil and it turns out there is, and it is super simple.
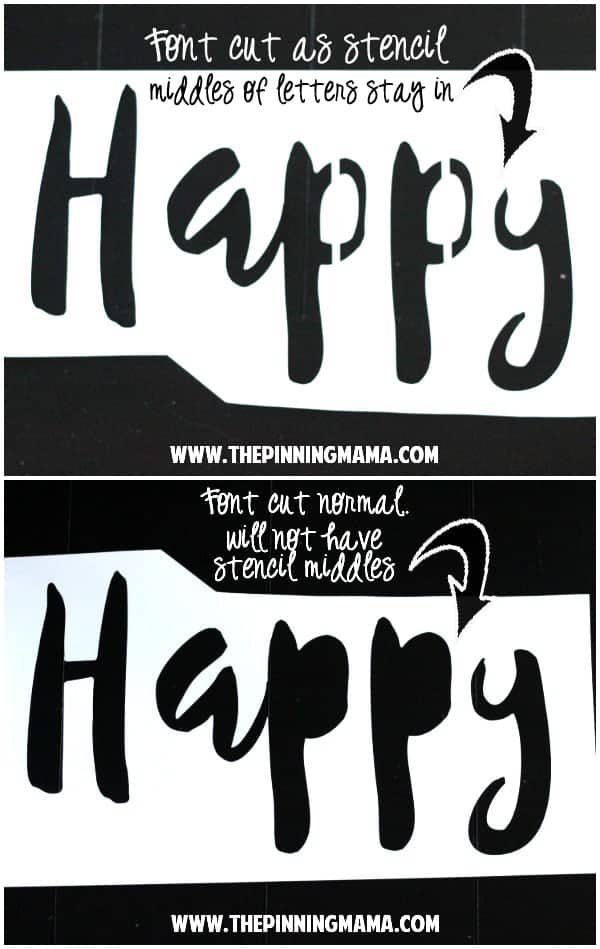
The illustration above shows the difference between cutting a font normally, where you would lose the middles of the enclosed letters and not be able to just paint over it as a stencil. Where as in the top example above, you can see that it is cut stencil style where it retains the middles so that you can easily paint wording onto a project.
So let’s get started!
How to Turn a Font into a Stencil in Silhouette Studio
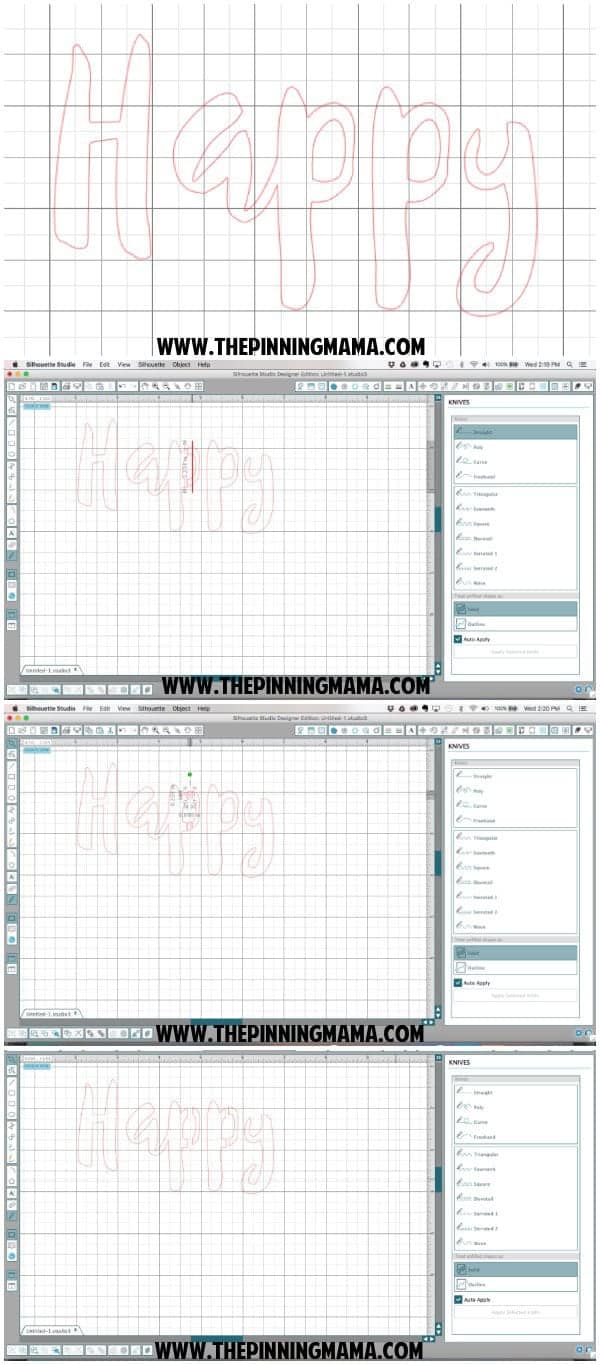
- Select the text tool and choose the font you want to use.
- Type your word in Silhouette Studio
- Select the knife tool from the tool bar (you want the straight one)
- With the knife tool, draw a straight line all the way through the first letter that is enclosed.
- NOTE: If you are zoomed out, you might not be able to tell that the knife tool cut the letter since the knife tool cuts so finely. Zoom in and you will see the cute much better.
- Draw a second line parallel to the first and very close to it.
- Use the select tool (looks like an arrow) to select the small piece left between your two cuts then use the delete button on your keyboard to remove it.
This will give you a piece of paper that will connect the outside to the inside of the letter and produce a stencil effect for any font! Now take a look at the short video to see exactly how I do this in action.
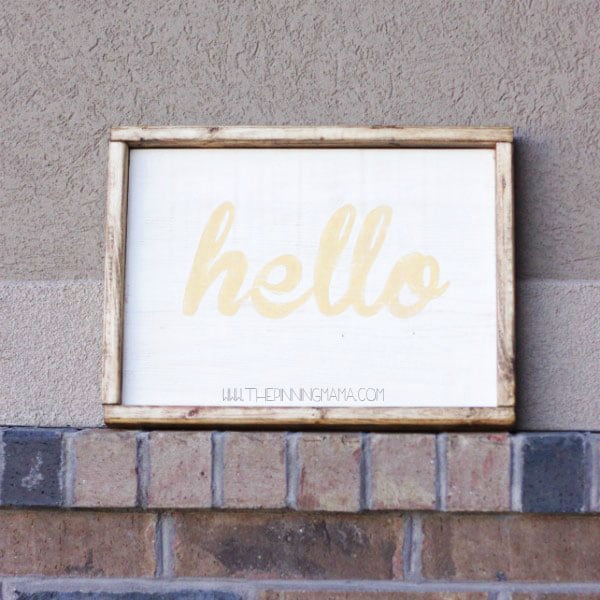
Pretty simple, huh?! I apologize for the lack of consistency on the words and fonts used in the tutorial on this post. I have actuall been trying to get this put together and out since 2015!! I know, I know! I am sorry for keeping it from you so long, but it finally got done! And how cute is this handmade wooden sign me and my neighbors made with the stencils I cut on my Sihouette CAMEO?
Please leave a note in the comments if this was helpful, or letting me know other skills you would love tutorials on or things you want to learn! Your comments are a great source of inspiration for my upcoming posts!


Christina in FL says
Kimber, this is a wonderful, simple tutorial which took me from frustration to an “I can do this!” mindset. Thank you! 🙂
Sandra says
Thank you for this excellent tutorial. I am trying to create a stencil template and when I select the ‘select tool’ I am unable to select just the piece that needs to be deleted it deletes the letter.
Any suggestions?
Here is what I’m trying to create . . .
WELCOME
TO
O365
Thank you.
Kimber says
First make sure you are slicing with the knife close together so there is a separate piece. Then try zooming in a lot. Sometimes the pieces are really small and hard to click on when you aren’t zoomed in close.
MyKin says
I have had the same issue I try to pick the select option and it doesn’t give me a small section to delete………
Kimber says
First make sure you are cutting twice with the knife to make the separate piece, then zoom in close so you can really see the small piece you want to remove. That should help!!
Melanie Stuber says
Thank you for this! Does this method require designer edition?
Kimber says
No you have a basic knife tool even with the free version!
Sheena Riddle says
When I use knife tool to slice through the letter. The new connection line does not auto create like it does on yours. I think is has to do with the “Auto Apply” button but that option does now show up on my version I guess.
Bobbie Sue says
The knife lines will auto apply if you choose “straight line” and “solid” on the right side bar.
Andrea Szabo says
Thank you, that was a fabulous tutorial that has really helped. Been looking for the perfect stencil font for ages, now I can do my own.
Christina says
I just got my cameo silhouette! Im having same problem and cant figure it out? When I cut it doesn’t make the line it just leaves the 2 lines open. How do u do that?
Kimber says
Hi Chistina-
Can you be a little more descriptive of what is happening? I am having a hard time understanding. Thanks!
meagan says
when trying to cut cardstock to make my kids birthday decoration the paper would stick to my cut sheet and not work.. any suggestions with this. I have heard you can just send the cardstock through but I never had luck
Kimber says
The cut mats have a reputation for being SUPER sticky when they are new. They will definitely loosen up a bit over time, but they also sell light hold cutting mats that are perfect for cardstock and paper projects! You can see it here: http://amzn.to/2fjkYtK
Gianna says
This was super helpful!!! Thank you for this tutorial. I just got my cameo this week and have been practicing with some of your other tutorials. However, some of the first projects I have in mind are stencil projects and I couldn’t figure out how to keep the middles in the letters. This was such a big help!!!!
I do have a beginner question though. So when you go to actually stencil how do you join the letters back together again where you made the cuts? Do you just go back and fill it in by hand?
Thank you for the help!
Kimber says
Hi Gianna- so glad it was useful! I personally just go back after I stencil and paint it closed. Sometimes if it is pretty small and my project is distressed I don’t even need to fill it on. Hope that helps!
Jen M. says
Are you cutting this simply with cardstock and painting over that (i.e. does the paint run under the cardstock and thus you don’t have sharp edges when you paint) or are you cutting this on a vinyl, applying vinyl, painting, then removing vinyl? Have you tried both options? Which is best?!
Kimber says
Hi Jen- I think it depends on the project. Vinyl doesn’t stick well to all wood and can be significantly more of a pain than a help. I mostly use cardstock with multiple very light coats of paint for a great result. Hope that helps!
Carolyn Schleufer says
Thank you so much! So glad to see there is stuff out there for those of us who are new at this!!!
Joan Grassi says
KImber, Your video was great but after repeated tries I cannot select just the cut area to delete. When I click the area it selects the whole letter. What am I doing wrong. I have the cameo 3 which I just got. Thanks
Kimber says
Hi Joan- Sorry for the delay answering. This comment slipped through the cracks. You may have gotten it figured out but if you zoom in on the area (a lot!) it will help you grab the piece you need much more easily or see if there is a problem with it. Happy crafting!