![]()
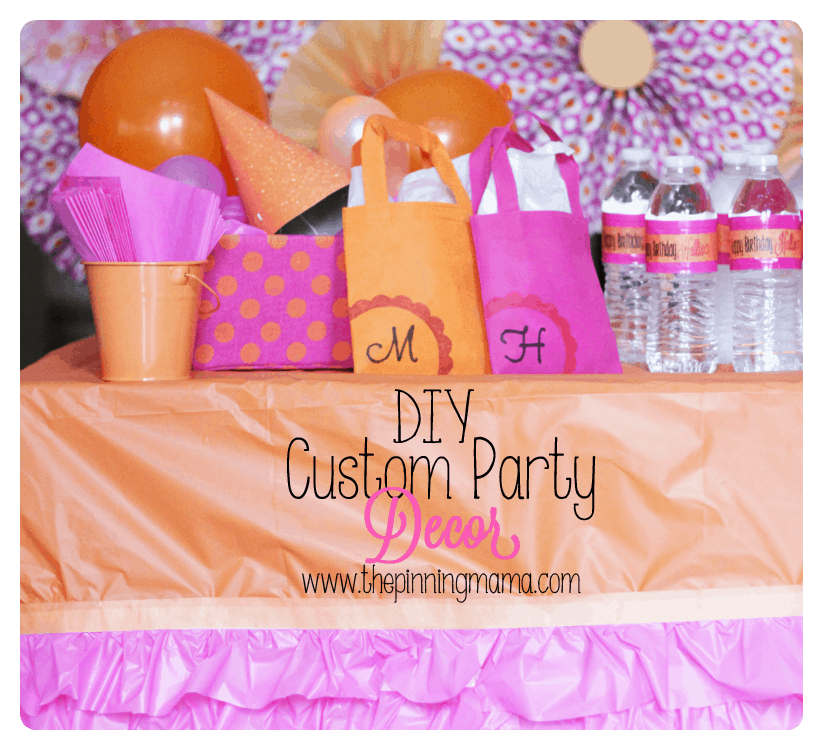
My baby girl turned one last week *tear*, so I will spare you all of my sappy sentiment and just tell you that when The Write Dudes sent me some of their new fabulous markers I immediately knew they would be used to create some seriously cute party decor for her birthday party this past weekend! You know how obsessed much we like personalizing things, so these markers were perfect to add the extra special touch to all of the party pretties.
When I throw a party I always do it on a budget. I just can’t stomach the prices people charge for things that are used for literally hours. Even on a budget, you can create a super cute and custom look to your party! You just have to get creative!
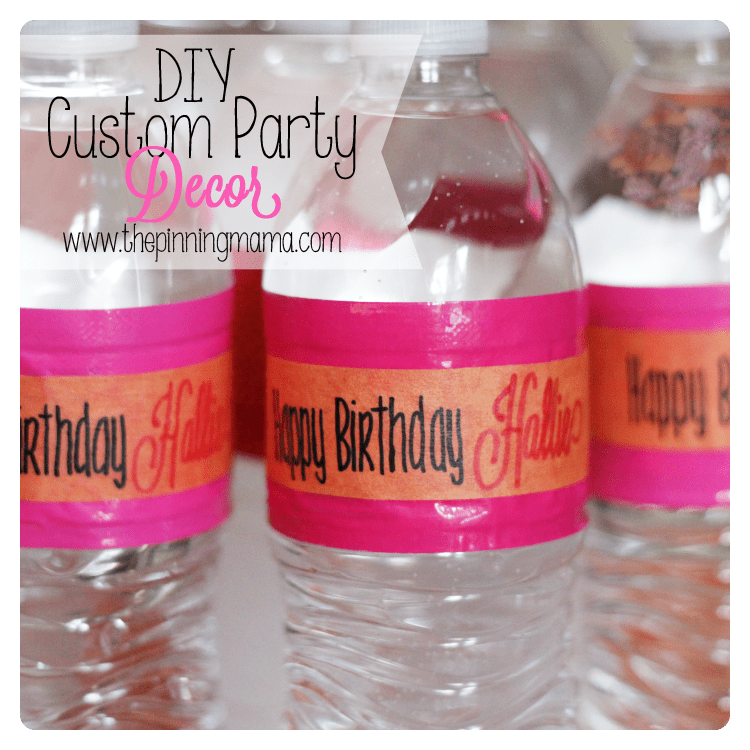
With all the decorations we made and put up, one of the things that got the most attention were the coordinated water bottle labels! I think people are just really impressed when they see a special detail that they don’t expect. You don’t need any special software or to even spend hours printing and cutting labels. These are so simple to make, and the secret to them is just layers of tape and The Write Dudes Permanant Markers.
You will need 1 roll of colored duct tape, 1 roll of colored masking tape, a pair of scissors and your The Write Dudes permanent markers in coordinated colors.

The duct tape is the perfect size to cover the label on most water bottles. So to start stick your duct tape on over the label and roll it around and then cutting it when the label is covered. TIP: Use the lines on the water bottle as a guide to help keep your tape straight.
For the coordinating color I used masking tape. It was perfect for a couple of reasons. First, the size was right for adding the accent color in the middle. Second, it is sticky enough to hold well but it also releases when you need it to which allowed me to add the text by tracing. So for step 2 just wrap a strip of the masking tape where ever you want it over the duct tape.
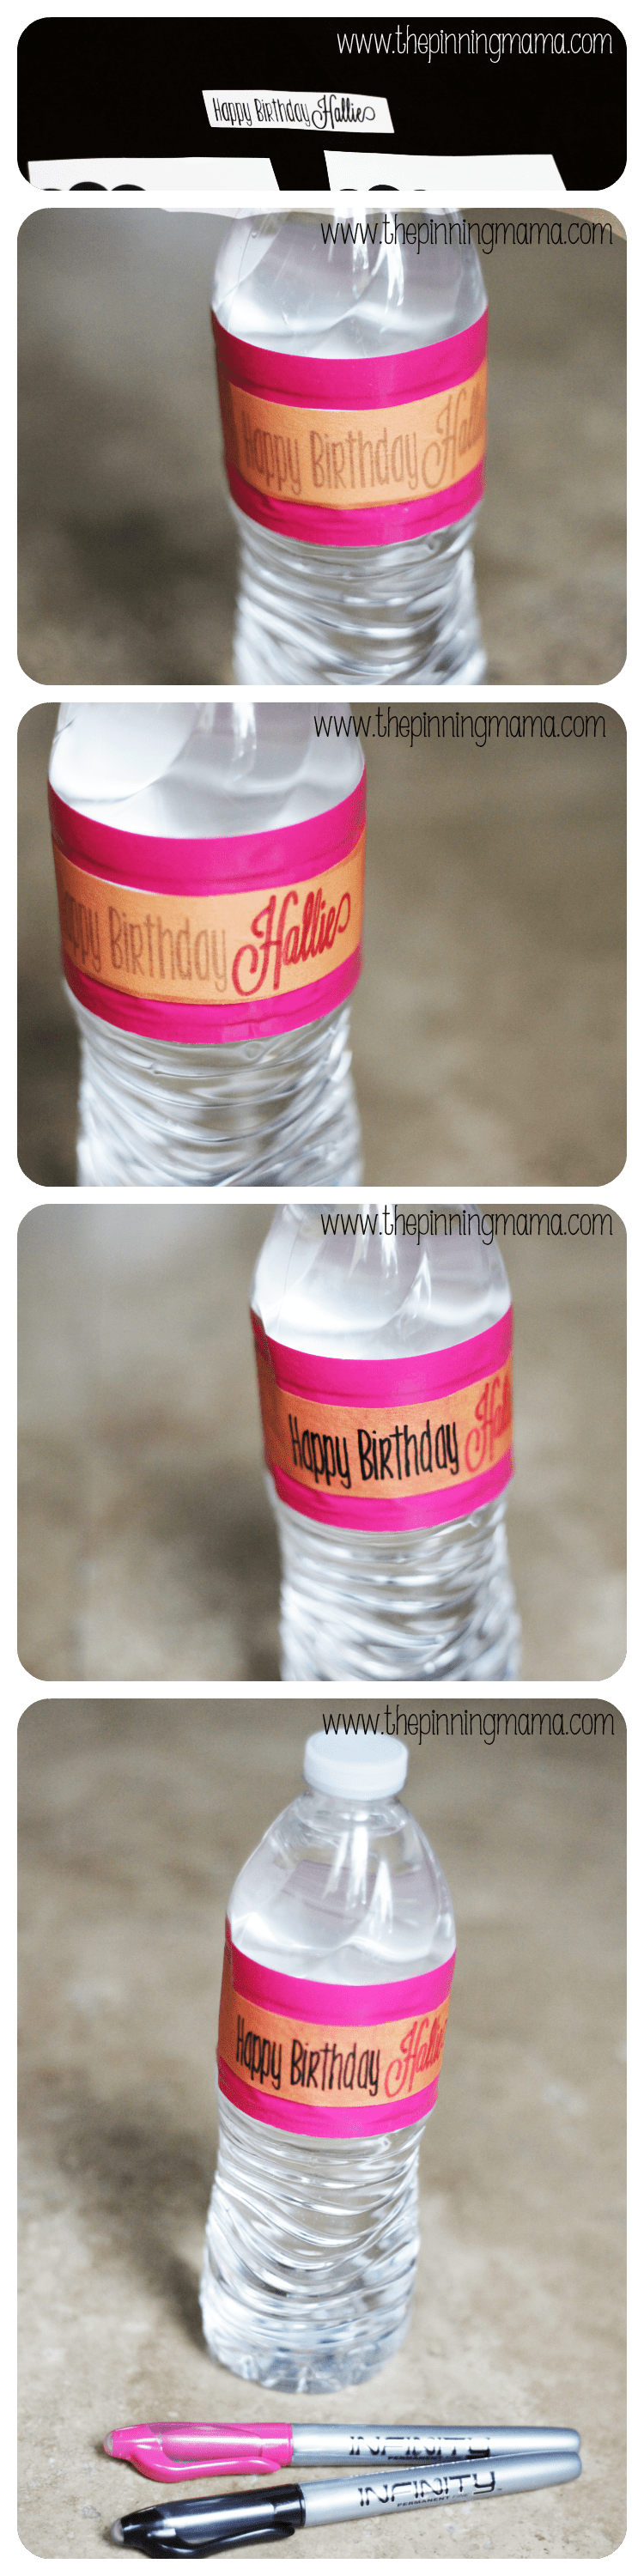
Now we will add the personalization{My Fav!} You will need to type out your text on any word processing program keeping the height of the text less than an inch {the width of the masking tape.} Once you have your text the way you want it, print it out and cut around it pretty close to the text. Now peel your masking tape up and place the paper with the words on it under the tape and press it back to down to the bottle.
Once you do this the making tape is thin enough to let you see the text so that you can trace it. So select your colors and use your markers to trace the text.
The packaging on The Write Dudes markers promised bright sparkling colors on light or dark colors but I was a little skeptical. I didn’t know if I would be able to use the pink on the orange or if the colors would be too close. The markers totally lived up to their claims though! I love how the pink ended up to be bold enough to hold it’s own, even next to the black text on the orange background.
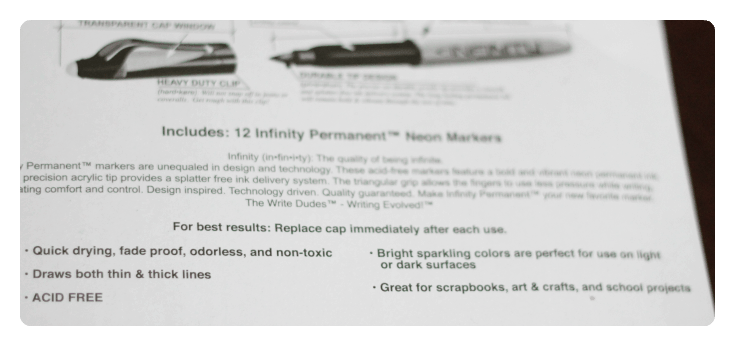
You can get these awesome markers at Target and even get a generous coupon for them here, or you can have the markers delivered to your door by Amazon.
Once you are done tracing the text, just peel the masking tape back up, and peel off the paper you were tracing. Then resecure the tape to the bottle and you are done!
One of the most impressive details of the party was also one of the quickest and simplest things I did!

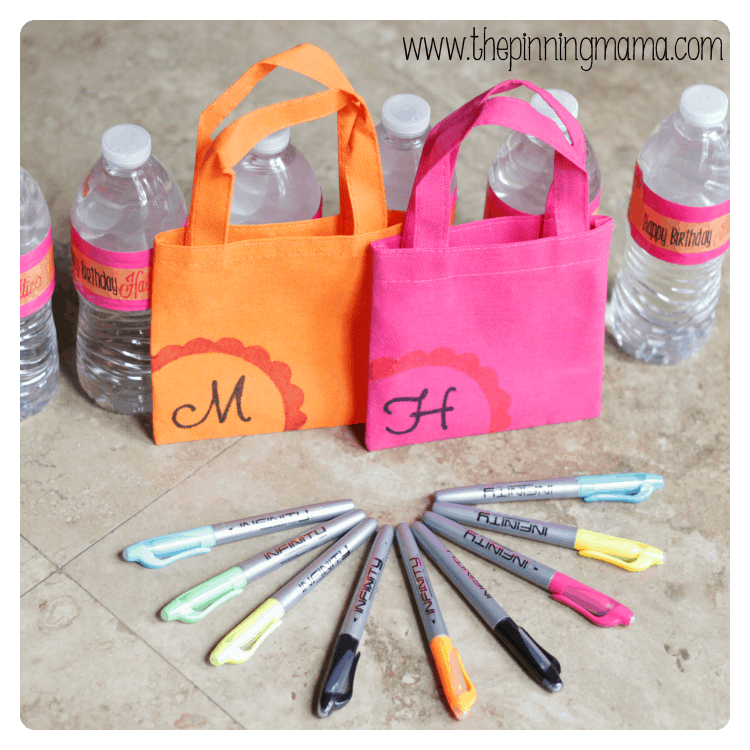
Even though the water bottles were the favorite among the adults, the favorite from the kids had to be the goodie bags! The markers made personalizing these so quick and easy!
I found the bags I used at the dollar store but these bags look pretty similar. The kids loved them and carried them all around. My little guy got so excited when he saw that there was an “M” for Micah on it! Again, just a personal little touch that made them extra special!
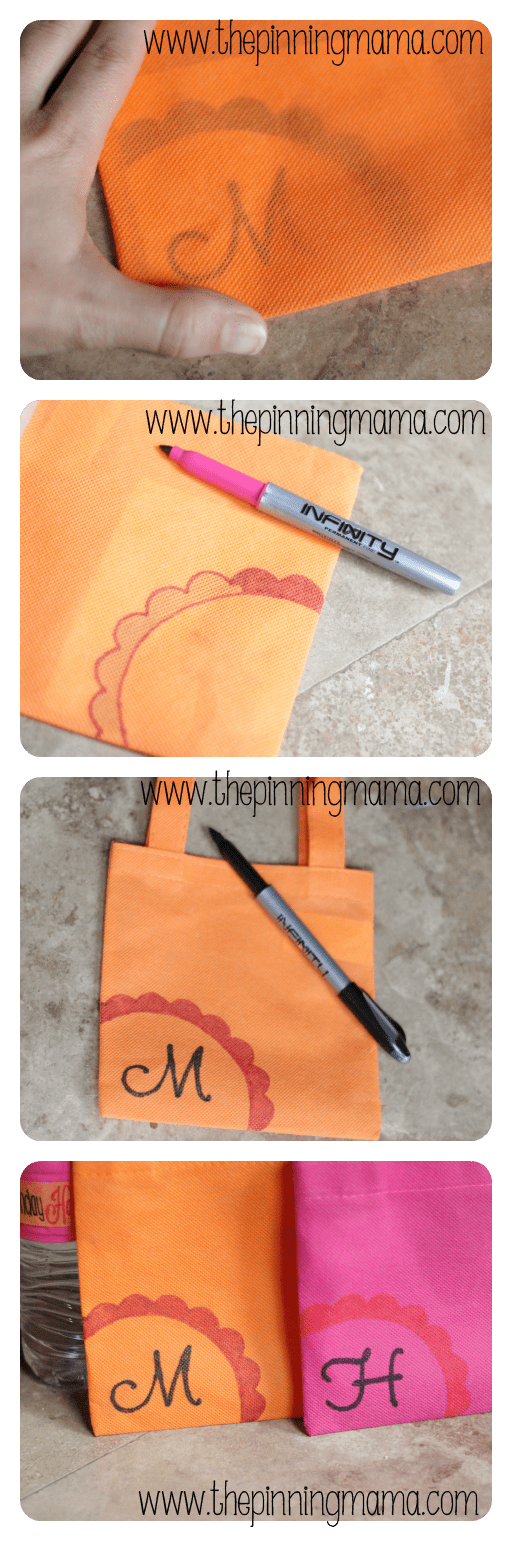
To make these bags you will need to open your preferred word processing program and create the design you want on your bag. Print out the design and trim around it. Next slide it inside the bag and you will be able to see the design and trace it with your permanent markers. TIP: If your design is more intricate in nature add a piece of tape or two to hold the paper in place while you trace. This will keep your design perfectly lined up!
Again these markers out preformed my expectations! I was floored how bright and beautiful the orange showed up on the pink bags! They turned out to be my personal favorite.
Two little details to make your party perfect… How easy was that? Make sure and follow us on Pinterest to see all of the fun things we are pinning and creating. Like FREEBIES? We have a whole section of freebies here! Also, become a fan of The Pinning Mama’s Facebook page to get exclusive free printables just for our fans!

We have more quick and easy DIY party decor ideas coming up soon like the cute paper backdrop in the background, the darling DIY ruffled table cloth, and some fun ideas for serving food and cake. Make sure and follow us on Bloglovin’ or subscribe to our RSS feed so you don’t miss a post!


kelsey house says
Love this! I will have to remember next time we have a special party! Thanks! Also you take awesome pics!
Kimber says
Thank you for your kind words Kelsey!The projects were pretty simple but lots of fun. We also have some photography tips if you click on “photography” category in the sidebar!
Renea says
Please advise what font was used for the water bottles?
Lexie Lane says
Wow! I love how you took pics of every step! Sometimes trying to explain in detail is still not enough. This is fantastic! Thanks for sharing this!
Kimber says
So glad you enjoyed it! I hope it helps make it perfectly clear and you are able to try it for a party of your own someday!
Debra Gordon says
I love those ideas..The tape one & using those dollar store bags are awesome and so simple.
Kimber says
Thank you Debra! I have recently re-discovered the dollar store and have been on quite a kick!
Sarah Bailey says
What great ideas and so simple! I have to admit I would never have thought of them, thank you so much for sharing 🙂 X
Kimber says
You are welcome Sarah! When I get on a roll things can get pretty creative around here!
Danielle @ We Have It All says
OMGosh what an awesome idea!! I LOVE this and so so pinning right now!
Kimber says
Thank you so much Danielle! We really appreciate you sharing it by pinning!
Granny Beth says
Great ideas! So affordable and so personal too.
Kimber says
Thank you! Sometimes it is the little things that make the difference!
Heather Walter says
Great, simple and cheap! All three are things I look for in a craft project. Isn’t it funny how the simplest things can get the most attention? Love your decor and the color combo choices too! Great job!
Miss L says
Thats so cool! Great and simple way and saves money! Love it!