Welcome Back to Lesson 22, I’m s orry for the week break, we are moving and things are a little crazy but I am back and ready to continue Bootcamp. A few weeks ago we learned all about Registration Marks for Print and Cut in Silhouette Studio. This week we are learning all about the Transform panel. Silhouette Boot Camp is filled with mini lessons that help us learn the terminology used in the Silhouette Studio software so that we can cut any design we can dream up with ease!
Before we get started, there are a couple of things to help you get the most of the experience:
- If you are new here, take a look the Silhouette Boot Camp Welcome with all courses listed and catch up on any you missed.
- Sign up for my Silhouette Newsletter which will email you when the lessons are released each week. {click HERE to sign up!}
- Pin this post! Each of these lessons takes me on average, 8-12 hours to create for you. I can do these lessons for FREE thanks to your support in coming to my site, reading the tutorials and sharing it with your friends. By pinning this post or sharing it on Facebook with your Silhouette friends, it helps you know where to find it if you need to reference it again, and it helps me spread the word so that I can keep the resources and freebies FREE to you!

What does the Transform Panel do in Silhouette Studio?
The Transform panel has many different options available. We learned about tabs 1,2, &5 already in this bootcamp series and I will link them for you. We learned all about the align feature in Silhouette Studio, and we also learned about using Scale/Shear. The third tab is Rotate which is simply moving your design around to different angles. The fourth tab is labeled move… which is moving your image by small increments around your page or finding points in your image you would like to move it to.
How do I use the Transform Panel?
First find your Transform panel located on the right hand side of the screen (looks like 3 rectangles with a line horizontally placed in the middle). Make sure your image is highlighted (gray box around the outside), after selecting the third tab you can rotate the image to your liking. You can rotate to 90, 180, or 270 degrees… or you can rotate by using angles 45, 90,180.
In the fourth tab of the transform panel you can move your object little by little up/down or right/left using the arrows. You can also move your object to a certain point you select using the move to area of the fourth tab. Simply select the area/dot you would like to move it to and hit apply.
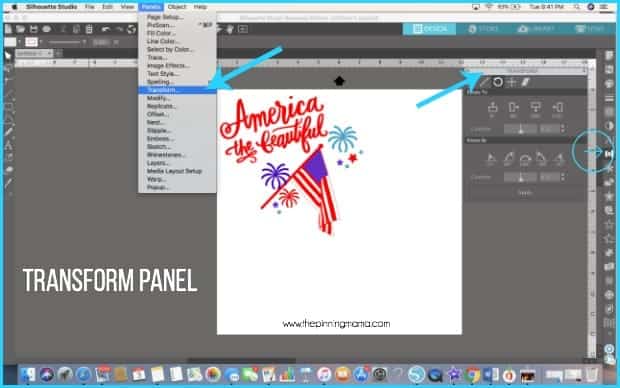
Where do I find the Transform Panel in Silhouette Studio?
You can access the Transform Panel in a few different locations.
- Right hand side of the screen, Transform icon (3 rectangles with a line through the middle), click on it and you will find the transform panel.
- In the top menu, click Panels, select Transform.
Example of using the Transform Panel:
Being that this month is America’s birthday I decided to make cute matching 4th of July shirts for all my kids. I bought the design in the Silhouette Store. I plan on using HTV in 3 different colors, printing each piece separately, then placing it on a white shirt.
When to use the Transform Panel:
The third and fourth tabs of the Transform panel are perfect to use when needing to change the direction of your design, rotate your design or move your design around to a different part of the paper by using the arrows. The Transform panel also has a few more of my favorite tools as discussed in previous lessons…..the align feature, scale and shear.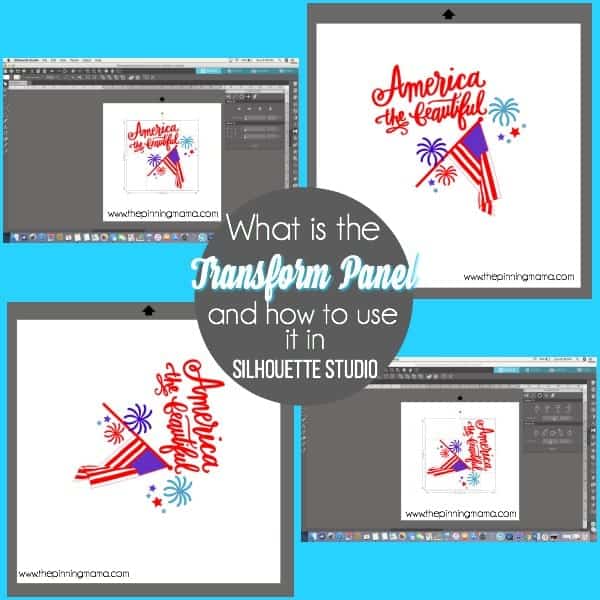
That’s all I have for you this week, tune in next week to learn all about Print and Cut from start to finish in Silhouette Studio.


Leave a Comment